Product name and model
Name: Intelligent colored LCD display for E-bike
Model: KD1286
Specifications
●1.9"TFT screen
●12V/24V/36V/48V/52V/60V/72V Power Supply
●Rated working current: 20mA
●Off-state leakage current: <1μA
●Operating temperature: -10℃~ 60℃
●Storage temperature: -20℃~ 70℃
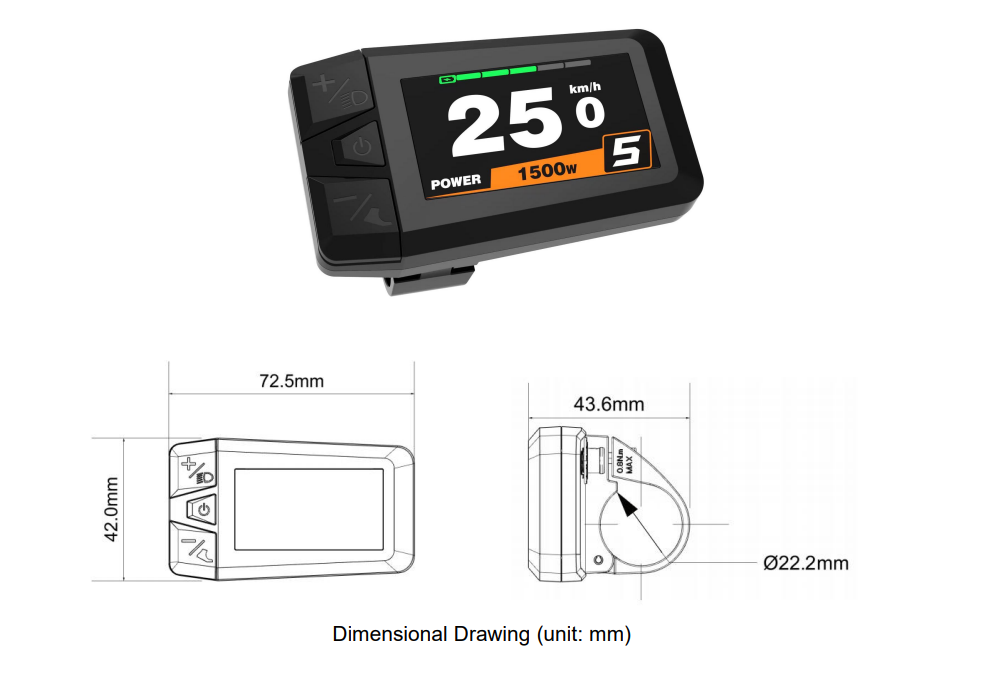
Appearance and Size
Display appearance and dimensional drawing (unit: mm)
Functional Summary
Functions
KD1286 can provide a lot of functions to fit your needs. The indicating contents are as follows:
●Intelligent Battery SOC indication
●Odometer and trip distance
●Assist-level indication and selection
●Trip time indication
●Power indication
●Speed indication (incl. Real-time speed, Max. speed and Ave. speed)
●Push-assistance control and indication
●Backlight control and indication
●Error code indication
●Various Parameters Settings (e.g., backlight, unit, power-on password setting, etc.)●Default parameter recovery function
●Bluetooth function
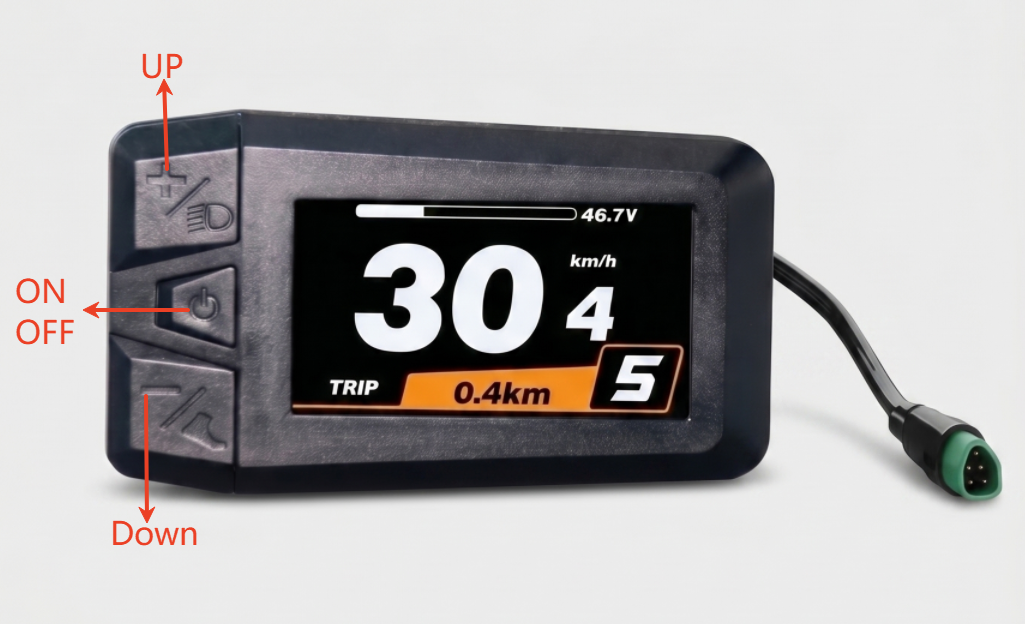
Button Definition
There are three buttons on the KD1286 display, including the Power ON-OFF/Mode button, + button and – button. In the subsequent instructions, is replaced by the word “ON/OFF”, is replaced by the word “UP”, and is replaced by the word “DOWN”.(as below)
General Operation
◆ON/OFF
Hold the ON/OFF button to switch on the E-bike system and controller is powered on. When display is on, hold the power button, the E-bike system will switch off and nolonger uses the battery power. When switching off the E-bike system, the leakage currentis less than 1 μA.
■When ebike is not in use for 5 minutes, the E-bike system switches off automatically.
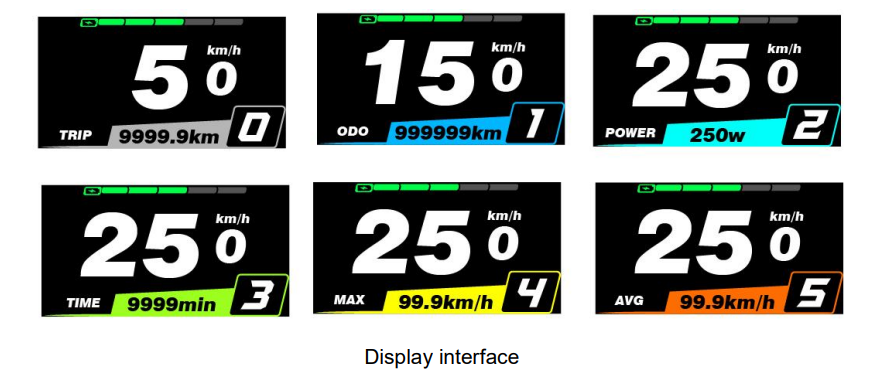
◆Display Interface
After switching on the E-bike system, the display will show real-time Speed(km) and Trip Distance(km) by default. Press the ON/OFF button to switch between following elements:
Trip (km) →ODO (km)→Power(Watt)→Time(Min)→(Max. Speed (km/h)→Avg. Speed(km/h)
◆Walk mode
After keep holding the “DOWN” button for more than 2s, The E-bike’s drive is activated at a speed of less than 6 Km/h while the screen displays “🚲”. The walk mode is gone as soon as you release the “DOWN” button. The E-bike system stops the power output immediately return back to the status before the walk mode is activated.

◆lighting control
Press and hold the “UP” button to turn on/off the display headlights, and at the same time notify the controller to turn the headlights on/off.

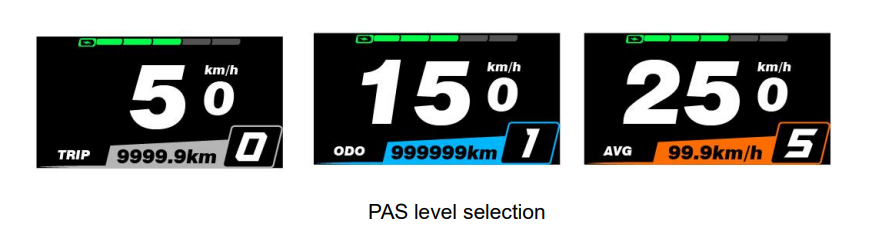
◆PAS level selection
Briefly press “UP” or “DOWN” button to switch between assistance levels so as to
change the motor output power. The default assistance level ranges from level “0” to level “5”, The output power is zero on Level “0”. Level “1” is the minimum power. Level “5” is the maximum power. The default level of the display is 1.
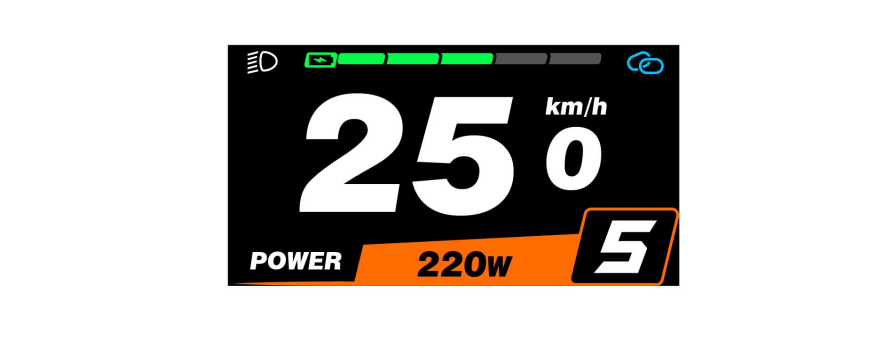
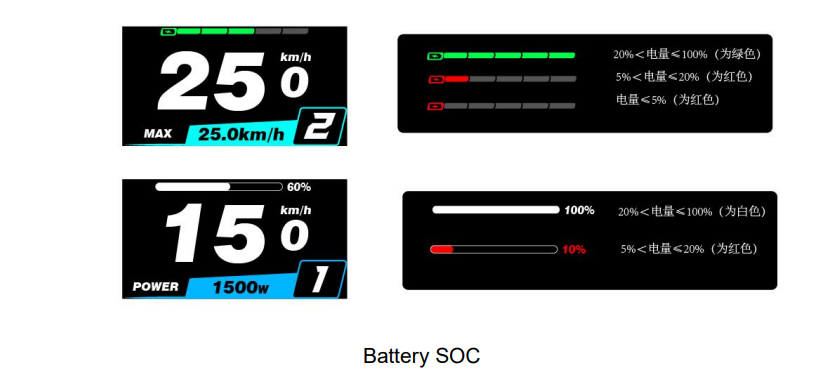
◆Battery SOC
The battery level is displayed in five segments by default. When the battery is under voltage, only the outer frame of the battery is displayed, indicating that charging is needed immediately.
◆Error code
When an electric vehicle’s electronic control system fails, the display will automatically display the error code and flash, and the entire interface will only display the fault symbol + error code.

■Have the display repaired when an error code appears. Otherwise, you will not be able to ride the bike normally. Please always refer to us.
Setting
■All settings need to be made when the vehicle is stationary.
When bike is parked with no speed, press UP and DOWN at the same time for more than 2 s to enter/exit the settings. Press “UP” or “DOWN” to switch the setting parameter items.

Display Setting
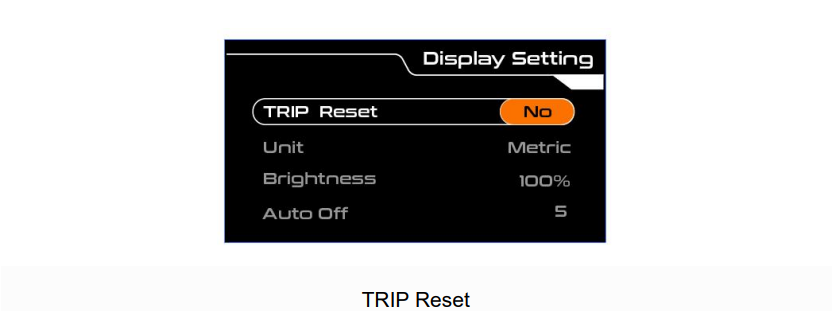
◆Trip Reset
Press “ON/OFF” to confirm, press “UP” or “DOWN” to switch between “NO (not clear)” and “YES (clear)” (data to be cleared including maximum speed (MAX), average speed (AVG), single mileage (TRIP), riding time (Time)), press “ON/OFF” again after confirmation to save and return to “TRIP Reset”, the display defaults to “TRIP Reset-NO”.
◆Unit
Press “UP” or “DOWN” to select “Unit”, press “ON/OFF” to enter the setting, press “UP” or “DOWN” to select “Metric” (kilometer)/“Imperial (mile)”, press “ON/OFF” to save and return to “Unit”.

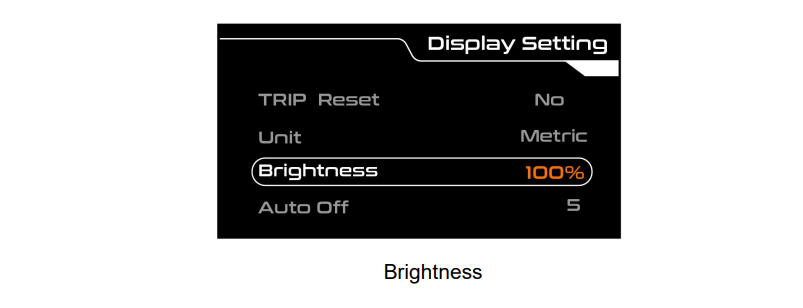
◆Brightness
Press “UP” or “DOWN” to select “Brightness”, press “ON/OFF” to enter the setting, by pressing “UP” or “DOWN” to select the desired brightness, the backlight brightness range is “100%-80%-60%-40%-20%”, 5 levels of brightness, 100%corresponds to the highest brightness, 20% corresponds to the lowest brightness; Press “ON/OFF” to save and return to “Brightness”. The default backlight brightness of the display is “100%”.
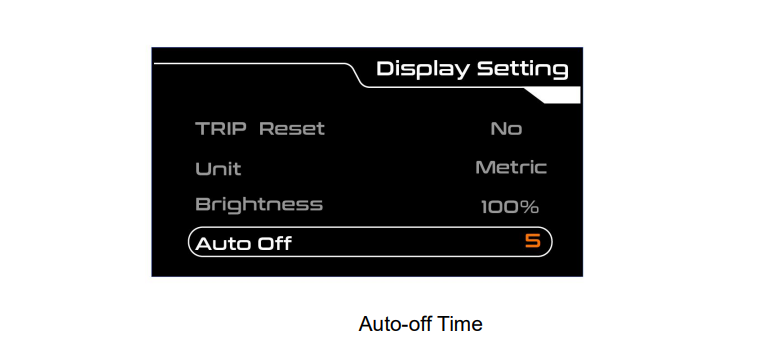
◆Auto-off Time
Press “UP” or “DOWN” to select “Auto Off”, press “ON/OFF” to enter the setting, by press “UP” or “DOWN” to select the desired duration, the automatic shutdown time range is “Off, 1-10min”, press “ON/OFF” to save and return to “Auto Off”. The display defaults to 5min.
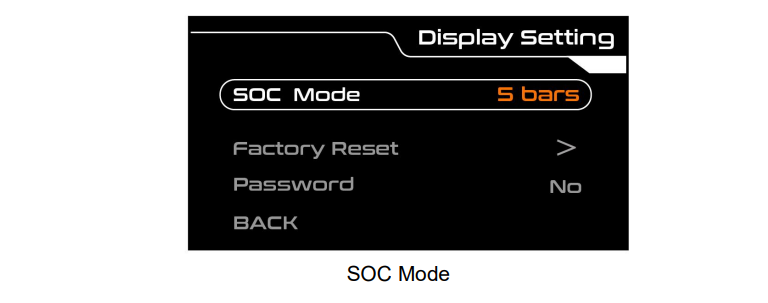
◆SOC Mode
Press “UP” or “DOWN” to select “SOC Mode”, press “ON/OFF” to enter the settings, press “UP” or “DOWN” to switch between “5 bars” and “Percent”, press “ON/OFF” to save and return to “SOC Mode”. The display defaults to 5 bars. Note: If the battery has BMS function, you can choose to switch to Percent indication.
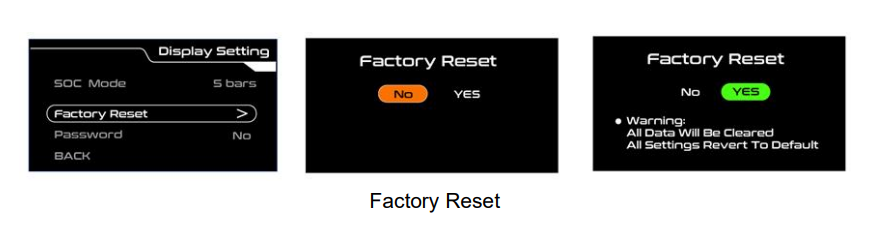
◆Factory Reset
Press “UP” or “DOWN” to select “Factory Reset”, press “ON/OFF” to enter factory reset, press “UP” or “DOWN” to switch between “YES” and “NO”, press “ON/OFF” to save and return to “Factory Reset”. The display defaults to NO.
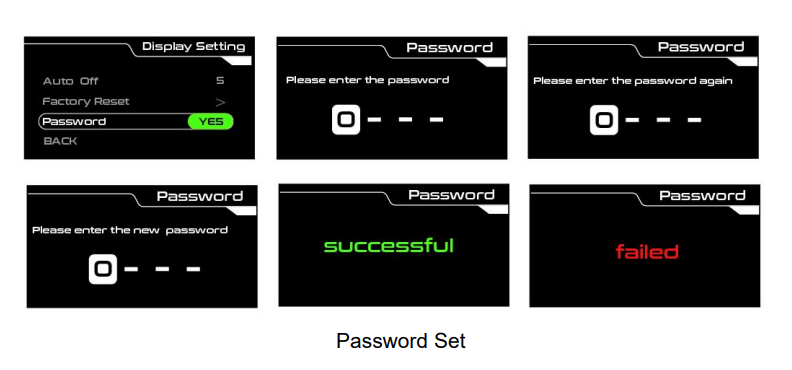
◆Password
Press “ON/OFF” to confirm, press “UP” or “DOWN” to switch between “NO” and “YES”, switch to “YES”, press “ON/OFF” button to enter the password setting state, press “ON/OFF” button to shift, press UP/DOWN button to increase/decrease input value, after entering the 4-digit password, press “ON/OFF” to confirm, enter the repeated password again, if the password is correct, it will display successful, otherwise it will display Failed.
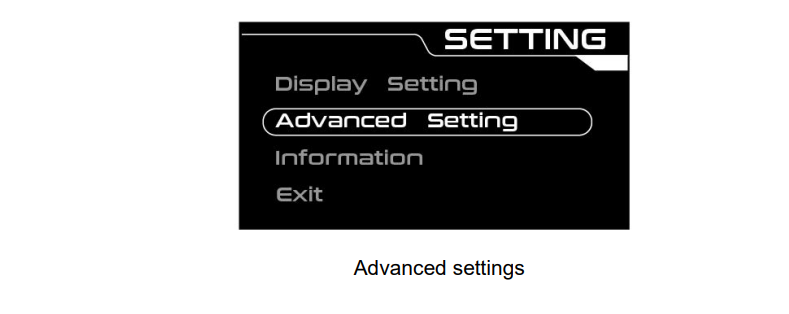
Advanced settings
In the Display Setting menu, select BACK, and press “ON/OFF” to return to the main setting. Select “Advanced Setting” by pressing “UP” or “DOWN”, and press “ON/OFF” to enter the Advanced Setting menu.
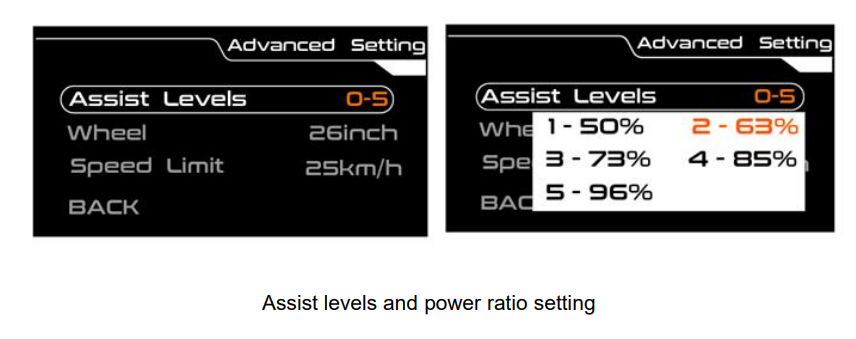
◆Assist Levels and Power Ratio Setting
Switch to the Assist Levels interface, press “ON/OFF” to enter the power ratio setting of each level. By setting the power ratio value, you can adjust the power output of each level to meet the needs of different riders. According to the 5S protocol, “50%” is the default value of the 1st level, which is a settable value. Press the UP/DOWN button to increase/decrease the setting, press the “ON/OFF” button to confirm and enter the next power ratio setting. After the setting is completed, press the “ON/OFF” button to confirm and exit.
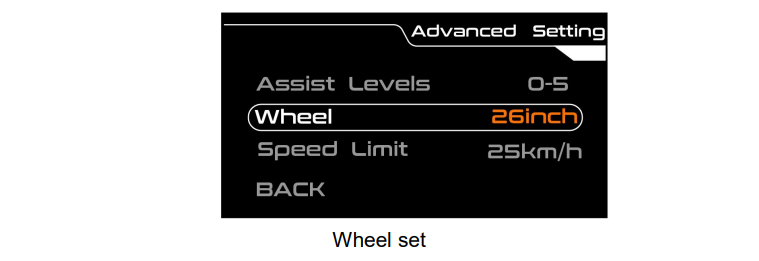
◆wheel
Press “ON/OFF” to confirm, press “UP” or “DOWN” to switch the value; after switching, press “ON/OFF” again to save and return to “Wheel”.
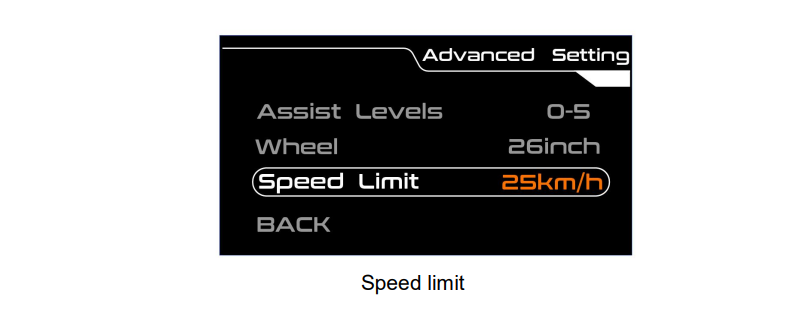
◆speed limit
Press “ON/OFF” to confirm, press “UP” or “DOWN” to switch the value; after switching, press “ON/OFF” again to save and return to “Speed Limit”.
◆Info
The information is used for traceability of the display and cannot be set.